
Recording online meetings can help make revisiting important discussions, decisions, and presentations easy. You can record valuable meeting content for future reference, training, or keeping team members who couldn’t attend in the loop.
As more people work remotely and collaborate online, the demand for recording virtual meetings has significantly increased. While built-in recording features in meeting apps are convenient, they often come with limitations, such as restricted access to the recording feature, recordings locked behind a paywall, or subpar recording resolution.
If you’re looking for complete control over your online meeting sessions, third-party tools can be a valuable asset to your company.
With that said, here are all the various methods you can use to record online meetings.
What is an Online Meeting Recording?
Online meeting recording captures audio, video, and whatever is being screen-shared by the participants in the meeting. This allows you to review and share the full meeting content later for reference, training, or collaboration.
Here are a few key benefits of recording an online meeting.
- Creates a Lasting Record: Recordings document exactly what was discussed and decided in meetings. This serves as an objective reference that can be reviewed when needed rather than relying solely on notes or memory.
- Makes Meetings Shareable: People who are unable to attend a live meeting can watch the recording to get back in the loop. Recordings also allow you to share meeting content with other stakeholders easily.
- Provides Material for Future Use: Meeting recordings can be repurposed into training videos, presentations, or other content assets. Key moments can be clipped and shared to highlight important information.
Where Can You Record Online Meetings?
There are two primary ways to record online meetings.
The first is through the built-in recording feature that is shipped with a majority of online meeting platforms like Google Meet, Zoom, and Microsoft Teams.
However, these options have certain limitations that make them an unsuitable option for enterprise usage.
Firstly, the recording options for most of these tools are locked behind a paywall. If you’re using a free account, there is a good chance that you won’t be allowed to record your meetings without an upgrade.
Secondly, the recording resolution of these meeting tools is limited. Google Meet and Microsoft Teams can record in 1080p resolution, which is ideal for most scenarios. However, if you plan to replay that meeting on a bigger screen or a projector in a meeting room, the 1080p resolution is not enough.
On the other hand, a free account on Zoom will only get you a 360p recording of your meeting, which is pixelated even on small laptop screens.
Thirdly, the file formats provided by meeting tools are often limited. If you need to edit the video after the meeting, your options might be constrained due to insufficient extension support offered by these tools.
If you’re looking to overcome these limitations, switching to a third-party tool can help.
Here’s how to record an online meeting using both first-party and third-party tools.
How to Record Online Meetings in 5 Steps
Here are five quick steps to record your online meeting.
Step 1: Use the In-built Recording Tool
First, check if your meeting platform has built-in recording functionality or if you have access to it. Many popular tools like Zoom, Microsoft Teams, and Google Meet allow you to record meetings directly within the app.
Look for a “Record” button in the meeting controls or consult the platform’s support documentation to see if the recording option is available and how to use it.
If the limited versatility of in-built recording tools is enough for your use case, feel free to skip the rest of the steps.
Step 2: Use a Third-party Recording Tool
If your platform doesn’t have a built-in recording or if you want to avoid the limitations we mentioned above, you should opt for a third-party recording tool. Screen recording software like Loom, Camtasia, or OBS Studio lets you capture your screen, audio, and webcam during meetings on any platform. These tools offer features like unlimited recording time, editing options, and if you use a tool like OBS, zero costs as well.
For this article, we’ll walk you through how to set up a recording studio using OBS.
Step 4: Obtain Participant Consent
Recording a Google Meet session might seem harmless, but depending on your location, you could be violating local privacy laws.
In the United States, the Electronic Communications Privacy Act (ECPA) operates under a ‘one-party consent’ rule. This means any person on the call, including the one recording, can legally consent to the recording.
However, some states, like California, Connecticut, Florida, Illinois, and Maryland, enforce a ‘two-party consent’ law. This requires formal consent from all participants for the recording to be lawful.
When collaborating with clients from other countries, it’s crucial to research your and your client’s privacy laws. Even if there are no specific legal requirements, informing all participants that the meeting is being recorded is ethical.
Step 5: Prepare OBS to Start Recording
Here’s how you can prepare OBS to start recording your online meetings.
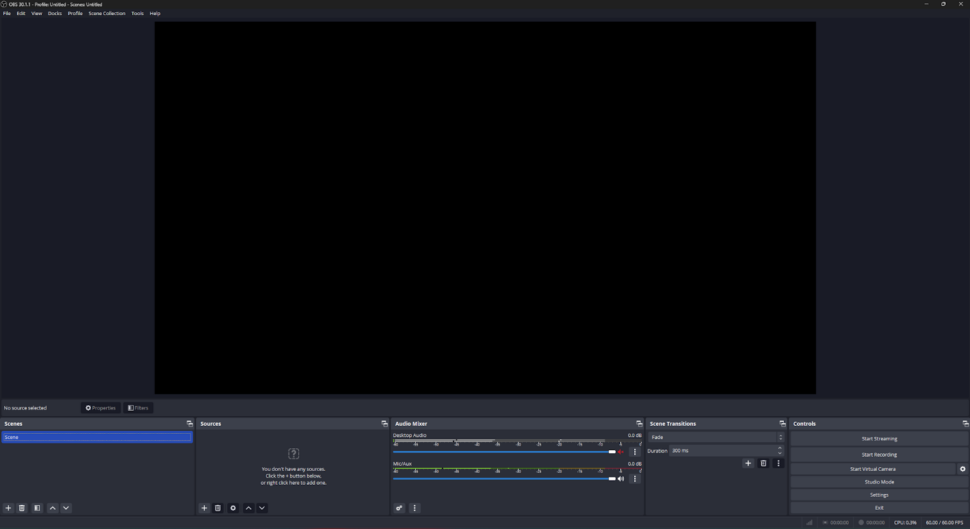
1. Launch OBS
- Open OBS on your computer. You’ll see the main interface, which might look a bit complex at first, but you just have to set it up once.
2. Create a New Scene
- Click the “+” button under the “Scenes” panel at the bottom-left corner.
- Name the scene something descriptive like “Meeting Recording” and click “OK.” You can leave this empty as well.

3. Add a Video Source
- Click the “+” button under the “Sources” panel.
- Choose “Display Capture” if you want to record your entire screen. This is useful if you’ll be switching between different applications. However, this could cause a privacy concern as you might end up recording personal information.
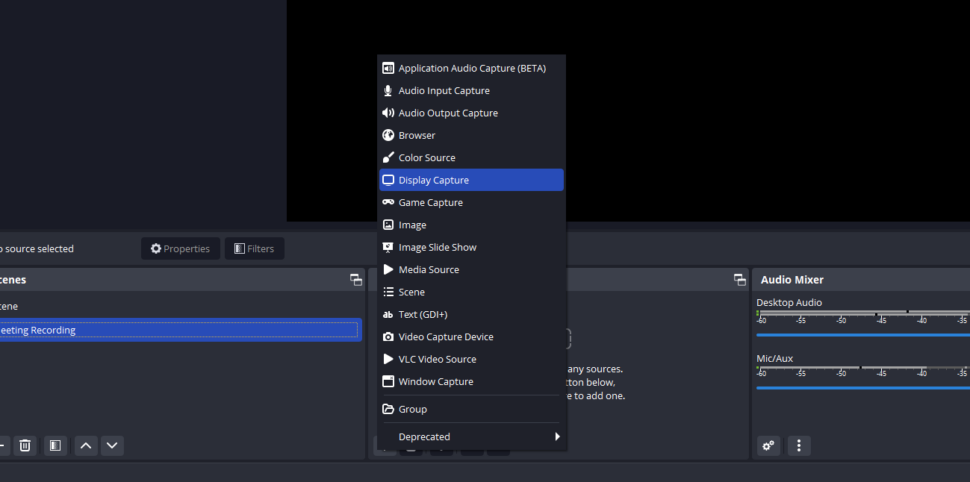
- Name the source (e.g., “Screen Capture”).
- Click “OK” and select the display you want to capture if you have multiple monitors.
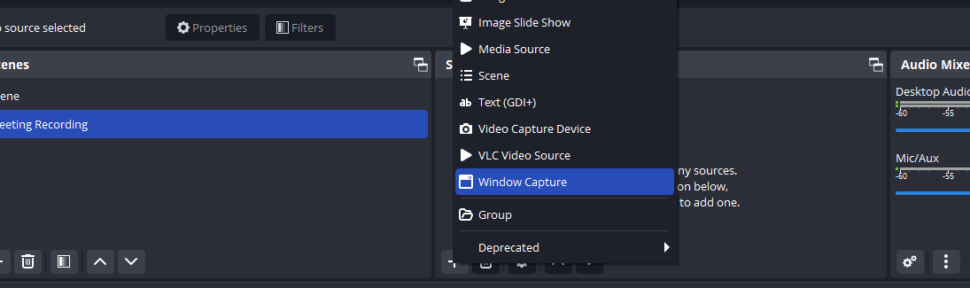
Alternatively, choose “Window Capture” if you want to record just the meeting window (Google Meet, Zoom, or Microsoft Teams). This can be a great way to ensure privacy.
4. Add an Audio Source
- Click the “+” button under the “Sources” panel again.
- Select “Audio Input Capture.”
- Name it (e.g., “Microphone”).
- Choose your microphone from the device list and click “OK.”

Make sure that you select the correct microphone from the list. Otherwise, the recording will not contain your audio.
- To capture the audio from the meeting, repeat the process but select “Audio Output Capture” this time.
- Name it (e.g., “System Audio”).
- Choose the appropriate output device (usually your speakers or headphones).
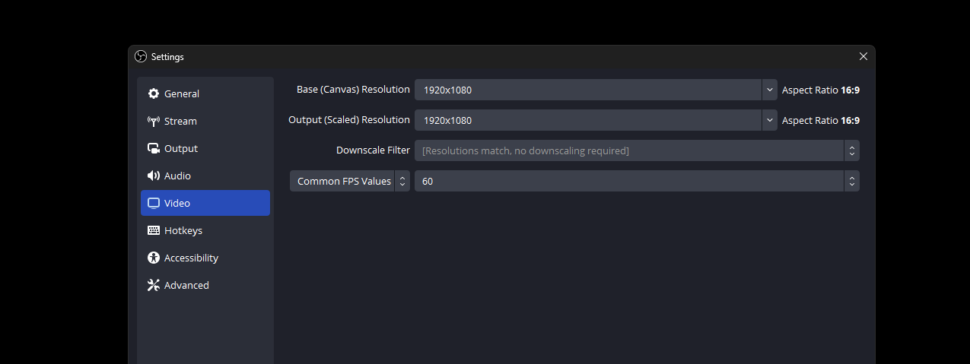
5. Configure Video Settings
- Go to “Settings” in the bottom-right corner.
- Click “Video” in the left-hand menu.
- Set the “Base (Canvas) Resolution” to your screen resolution.
- Set the “Output (Scaled) Resolution” to the resolution you want for your recording. Common choices are 1920×1080 or 1280×720. Remember that the higher the resolution, the greater your recording size will be.
- Choose “Common FPS Values” and set it to 30 if you’re not going to have a lot of moving text or 60 for a smoother video.
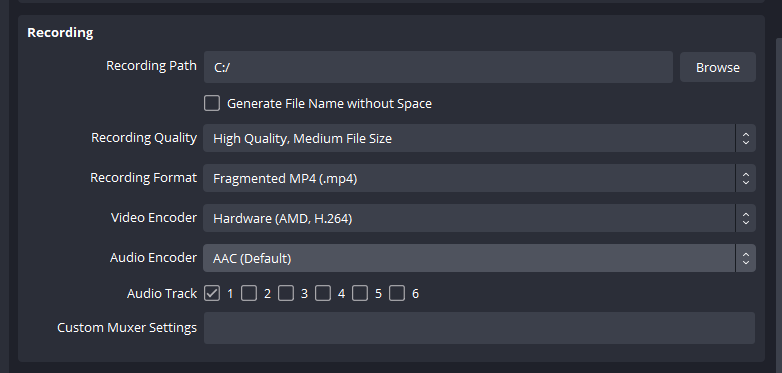
6. Configure Output Settings
- In the “Settings” menu, click “Output.”
- Go to the “Recording” tab.
- Set the “Recording Path” to the folder where you want your recordings to be saved.
- Choose a recording format like MP4 or MKV.
- Set the “Recording Quality” based on your needs. For most purposes, “High Quality, Medium File Size” is a good choice.
- You can leave the rest of the settings unchanged.
Step 6: Start Recording
Once you have all the right settings configured, you’re ready to start recording the meeting.
Open your meeting application (Google Meet, Zoom, or Microsoft Teams). Make sure that you can see the right meeting window in the OBS preview window.
Go back to OBS and click “Start Recording” on the right side. Conduct your meeting as usual. OBS will record everything on your screen and the audio from your microphone and the meeting.
When your meeting is over, go back to OBS and click “Stop Recording.” Your recording will be saved to the location you specified in the output settings.
Step 7: Share and Utilize the Recording
Once you’ve saved your meeting recording, it’s time to use it. Share the file with all meeting attendees and any stakeholders who would benefit from reviewing the content. Upload the recording to a secure, shared drive or video hosting platform and send out a link with clear access instructions.
To make the most of your recording, consider transcribing it into a searchable, text-based format. A transcription allows you to scan the meeting content quickly, find key discussion points, and extract important information without having to rewatch the entire video. You can then share the transcript alongside the recording for easy reference.
Meeting recordings are valuable resources for training, onboarding, and knowledge sharing. Use them to:
- Create training videos for new hires or team members who need to learn a specific process or skill
- Develop a library of past meetings on key topics that employees can access on-demand
- Clip important segments to share as standalone resources or to supplement other training materials
- Provide a record of decisions, action items, and project updates for future reference
When sharing meeting recordings, consider security and privacy considerations. Ensure that only authorized individuals can access the files and that any sensitive information is properly protected. Use your organization’s secure file-sharing tools and follow best password protection and access control practices.
It’s also a good idea to establish clear guidelines around how long meeting recordings will be retained and who is responsible for managing them over time. This helps prevent data clutter and ensures that recordings are only kept as long as they’re needed.
By leveraging your meeting recordings for training, reference, and knowledge sharing, you’ll maximize the value of the time and effort that goes into each virtual gathering. With a well-organized library of recordings, your team can easily access the information they need to stay informed, aligned, and productive.
Streamline Your Meeting Workflow with Sonix
Once you have the recording ready to go, you should consider transcribing it to maximize the usefulness of your recordings.
Transcribing an online meeting recording is highly beneficial as it ensures that important discussions and decisions are documented for future reference. It enhances accessibility for team members who couldn’t attend, allowing them to stay informed.
Transcripts are searchable, making it easy to find specific information quickly. They also facilitate better understanding and retention of meeting content, aiding in project continuity and accountability.
Additionally, transcriptions can serve as official records for legal and compliance purposes.
With that said, if you’re looking for a reliable way to transcribe your online meetings accurately, Sonix is the best tool to help you out.

Transcribing Meetings with Sonix
Sonix provides an integrated platform for transcribing, translating, and managing your online meetings. With its advanced AI algorithm, Sonix can transcribe your online meetings with 99% accuracy in just a few minutes.
Apart from that, Sonix comes equipped with advanced analysis tools like:
- Automated Summaries: Generates concise, accurate summaries of the meeting content similar to meeting minutes.
- Generate Chapters: Creates chapters of the contents discussed in the meeting to make the data more navigable.
- Thematic Analysis: Uses AI to identify the theme of the conversation.
- Sentiment Analysis: Detects and identifies the sentiment and tone of the current speaker.
- Topic Detection: Uses AI to summarize and detect the topics mentioned in the meeting.
- Entity Detection: Labels speakers and keeps track of the contributions of each individual.
Discover how Sonix can transform your meeting process and enhance productivity. Visit Sonix today and get a 30-minute free trial. No credit card required.
How to Record an Online Meeting: Frequently Asked Questions
Is It Legal to Record Online Meetings?
Yes, but you must inform all participants and obtain their consent. Laws vary by location, so familiarize yourself with the regulations in your area.
How Can I Record a Meeting Without Built-in Recording?
You can use third-party screen recording software like OBS to record meetings.
What Is the Best Way to Share Recorded Meetings?
Use secure cloud storage or a company intranet. Ensure only authorized individuals have access to the recordings.
What if a Participant Objects to Being Recorded?
Offer alternatives like providing a meeting summary or allowing them to participate without being recorded. Respect their privacy and consent.
World's Most Accurate AI Transcription
Sonix transcribes your audio and video in minutes — with accuracy that'll make you forget it's automated.
